Sunday, July 25, 2010

My Friend Reggie

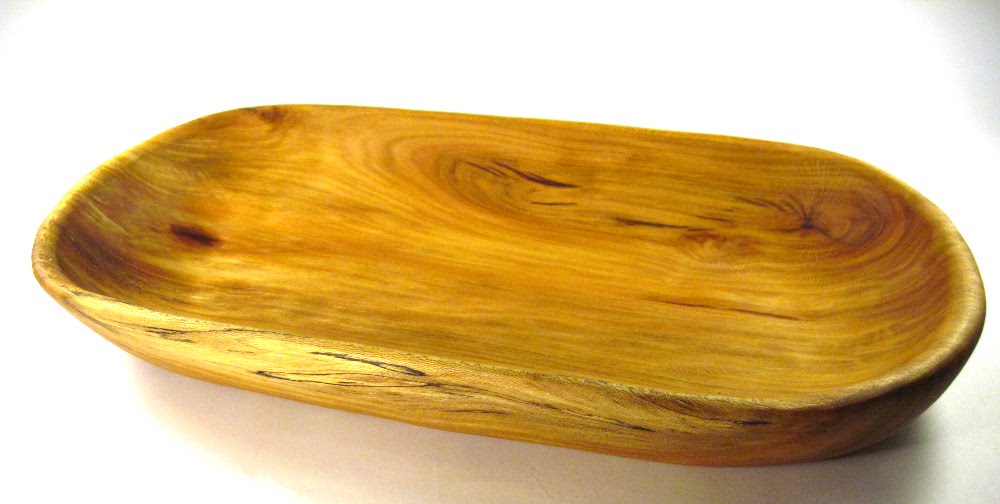
There are people you meet that you know instantly are going to make some aspect of your life better or easier just by virtue of the fact that they exist. Reggie Power is this person for my wood shop. I recently had the honor of presenting him with the bowl I made for him in exchange for a generous supply of beautifully seasoned walnut. We made this trade about 6 weeks ago. The making of this bowl became more than just a matter of exchange for me though for one main reason. We had agreed to meet on a Saturday earlier that week to make a trade. He'd give me lumber from which I would carve many bowls. One of these bowls I would give to him for the entire stock of wood. When I arrived at his mill that Saturday we exchanged pleasantries as we've become friends and everything seemed normal. After a while though he asked me about my parents and were they still alive and all that.
This conversation eventually revealed that Reggie's mother had died unexpectedly the last evening. I naturally expressed my sympathies and informed him that he could have called and rescheduled our appointment to another date to which he said that working in the mill and talking with me made him feel better. I was touched by these kind expressions of friendship and it warmed me even though I felt sadness for my friends loss.  The next day in the shop I set to work on his bowl with a sense of purpose and responsibility. I had to make him a good bowl, and I feel I did.
Driving to Reggie's is a jaunt through the beautiful Missouri country side as it sweeps down to the broad majestic Missouri River. It's as honest as the people who inhabit it, "don't tell me, Show Me" the saying goes, and on these back roads Missouri shows you just how pleasant she is and why I live here. Stepping out of the car I knew there was Garlic afoot, it was everywhere. Reggie had just harvested his crop for the local markets. It reminded me of walking through Garryhinch wood outside Mountmellick in Ireland when I was a child.  The tall oaks, elms, beeches, and chestnuts impeded the undergrowth as far as you could see. Creating a world beneath the canopy that looked cultivated and manicured. But every now and then you would wander into a vast field of wild garlic in flower like Wordsworth into the daffodils. Beautiful and pungent, what a great memory.
Reggie's is a treasure trove for folks like me. Oak, sycamore, walnut, cherry, elm, and on and on. Each cut to a respectable non industry standard sizes and seasoned. For most applications you need kilned wood. The kilning process drops the moisture content down to 5-7% of the over all weight of the wood. This means that the wood is far less susceptible to cracking and splitting in our air conditioned homes where vast variations of humidity and temperature occur on sometimes a daily basis.
The problem with kilned wood for me is two fold. Firstly the reduced moisture content means that the wood has far less detail to it. You take a piece of seasoned walnut and put it next to a piece of kilned walnut and the seasoned will win  any beauty contest you through at it. Secondly the kilned wood is dryer so the fibers of the wood are dryer and harder to finish. You can polish a piece of seasoned wood to a far higher grit and gloss than any kilned wood you care to mention.
So I love the seasoned hard woods, but you try to build a complex piece of furniture out of it and your going to be in serious trouble. Each component of your furniture is going to expand and contract at different rates, causing a lot of pressure across every joint and seem of the entire piece. Eventually the whole thing will just collapse like the car at the end of the Blues Brothers. The bowls however are all one natural piece of wood that is able to expand and contract in a uniform manner.
Traveling to Reggie's is incomplete without scouring through his vast stock of aged seasoned hardwood. Today I picked up some Sassafras which I've never carved before and some more walnut. Over the next few weeks you'll see some of that carved into dough bowls, trenchers, and votive holders. Thanks for reading and here's to Reggie.


Wednesday, July 21, 2010

River Rock Votive Holders

In the process of carving my dough bowl and trencher bowls I end up with lots of little pieces of wood lying around. Most of the wood gets pulverized into shavings that get sucked into my dust collector or gather on the floor, bench, shelf, you know, any available horizontal surface. Some of the pieces though are larger and I always felt I should do something with them rather than throw them out. I thought about doing parquet with a scroll saw and some clamps, or gluing blocks together to form larger carving blocks for bowls. I even considered buying a small lathe to make pen blanks and maybe even a few pens. The expense on this project though was prohibitive.
No I needed to something out of the scrap pieces that
I could do with the tools I already had and was true to the goals and beliefs of my wood shop. That is to produce as natural and simple a product as possible that relied on the natural beauty of the wood rather than chemicals, dyes, glues, and the use of jigs in carving. In my humble opinion once a jig enters the fray the piece is no longer the product of carving but something else. I'm not saying relying on a jig is a bad thing it's just not what I wanted to do. Any thing I made from these pieces had to reflect the natural aspect of the wood, all that beauty should be displayed in an item that reflect the natural world from where it came. This was my challenge.

One night after a hard days carving and running after my twin boys to prevent the inevitable I was lying in bed pondering the Universe or some other unfathomable thing when an image hit me. River Rocks, carved out of wood. Simple, clean, natural. The shape can be manipulated to accentuate the natural beauty and texture of the wood. They can come in all kinds of shapes and sizes so no two will ever be alike. They can also be carved with the tools I have with no new tools to buy or learn to use. Eureka! I have my new product line...but wait a minute. Who wants to by a wooden river rock and what would they do with it?

Well I was going to worry about that question later right now my task was to create a couple of them as prototypes and see if it could be done and what they looked like. The first one I carved was the persimmon one shown below. It came out just as I envisioned it, smooth, natural, and carveable. It was however a pretty but not very heavy paperweight. I was losing hope in the viability of my project and offhandedly showed it to my wife Julie. Distracted for a short time I came back to find my wife playing with a votive glass and my river rock. Well she did it again folks! Hence the River Rock Votive Holder Series came into being. 
 I did in the end have to by a drill press and a Forstner bit to drill the holes. Finding a drill press that can drill a 2" Forstner at a reasonable price is a whole other blog post. Especially when you consider the five I returned for being virtually useless. So now folks I hope this explains some of the story and thoughts behind this line of wood products. They are a great joy to make and photograph. The new price point has allowed me to offer products to a much broader range of potential customers and this has been very good for my small wood shop. Until next time, thanks for reading and happy carving...or what ever it is you do.

Wednesday, July 7, 2010

How to Make a Sycamore Dough Bowl

It may seem intuitive but I guess it's still worth saying that any wooden bowl starts out life as a lump of wood. This particular lump of wood is a piece of sycamore destined to become a support for a mobile home somewhere in Mid Missouri before I graciously intervened in this fate. I scout lumber yards like varsity coaches do high schools looking for that diamond in the rough no one else has noticed. Once rescued the block is roughed out, sealed with Anchorseal and left to season. Seasoning a block of wood is an entire blog post but suffice to say that roughing out the blank significantly speeds up the process. Sycamore is a nice wood to use in my experience as it's stable when seasoning, far less likely to crack and split, and is easy to carve with a rich but consistent color lending itself to a pretty bowl.

The first task is to define the exterior of the bowl. Dough bowls can have many different shapes. Some are wide, some are narrow, some have handles and some don't. Many dough bowls, although beautiful, are designed with utility in mind. This is where the handles, taller, deeper, rounder aspects of design come in to play. Many serious bakers look for these characteristics when buying or commissioning a bowl.
The design I use is strictly geared towards what I find visually pleasing. I like the shape, it feels uncomplicated and appropriate our modern sense of design and living. That said I'm still governed by what the wood can do for me. You have to "listen to the wood". See where the prettiest patterns are, work around the knots and cracks and deliver the most bowl for the blank possible. My bowls will either emerge with a rounded side or a pretty straight side, I'm really not quite sure why it just seems to happen. This one is of the straight variety.

You can see in the photo on the right a large knot on the top side of the bowl that caused me some problems. When I first opened the blank it seemed to be clean and fit for carving. I lose about half the wood I season due to flaws like this that are apparent before carving. There are many reasons for this but the main ones are that I don't have the room to store large pieces of fresh cut green wood as many carvers and turners do. This storage ability gives the woodworker control over the conditions to which the wood is subject very shortly after the wood is felled. The sooner you seal the wood and place it in a stable environment the more likely you are to emerge with a successful blank. I have to rely on wood that has been sawn at a mill and may have been exposed to the elements. The fact that I loose some blanks only bothers me when it's a particularly nice piece of wood that I loose. I find many other things to do with this lost wood and visitors to my etsy store will see in the form of votive holders. This particular crack proved not to be a major issue as I was able to work it out of the final product.

Once the exterior has been defined it's time to bring the interior out to meet the exterior. When I started carving bowls I carved the opposite way. This came to a crashing stop when I found that after carving out the interior of a particularly nice piece of walnut the exterior had a flaw. The fact that the interior was already carved left me no wiggle room to correct the problem and much to my chagrin the entire piece and several hours work had to be discarded. It's still possible for the interior to pose a problem but this hasn't happened yet.

You can now see the bowl starting to take the familiar shape we all know and love. The vise you see in the picture is one I designed myself to hold bowls in place and be flexible for the many different stages of carving. It's made out of 2X2 oak which interlace to form a floating work surface that protrudes from the bench. After messing with clamps and such for a long time with little if any success this vision came to me as the elixir of all my carving problems. I'm quite proud of it for with the exception of sticking a little in very humid conditions it has been extremely successful.

The exterior and interior are then sanded and polished. This process has been made significantly easier with the addition of this flexible shaft from King Arthur's Tools. It has a chuck on the end of it that allow me to attach sanders and polishers and move them almost anywhere on the bowl. This flexibility means that a bowl can be finished quicker with far less irritation when it comes to getting a sander to a particularly hard to reach part of the bowl. Ye have to thank Julie, my wife, for this one as it was an anniversary gift.

The finished bowl is now ready to oil. Oiling makes the wood "come alive" as a friend describes it. It also seals the wood against damage from a variety of sources.


I use an organic tung oil from The Real Milk Paint Company. This oil is natural and food safe but is labor intensive to apply. It is however the best and most permanent natural finish to apply to a food safe bowl and is well worth the six weeks or so it takes to fully cure.

Now for this weeks other bowls!

This bowl is a large walnut dough bowl, 19X7X4
This is another large piece of walnut. 18X10X3

Thursday, July 1, 2010

Better Photographs

I received some advise on improving my presence on blogs and etsy. Apparently people really like good, interesting photos, go figure. After initially feeling a little defensive on the implied lack of  Ansel Adams talent I decided to set my mind to improving my photos and making them a little more interesting. I have found myself wandering the vast and mostly vacant halls of the web discovering little and feeling a little numb. However when you have a particular question or need it is the most amazing tool of knowledge from which many good things can come. Here are some websites I discovered from which I garnered most of my knowledge on the subject of photos. It does little good to regurgitate what they have already said  just go there for yourself.

http://www.studiolighting.net/homemade-light-box-for-product-photography/
http://www.bermangraphics.com/digital-jury-resources/digital-cameras.htm
http://digital-photography-school.com/macro-photography-tips-for-compact-digital-camera-users

I set about lighting the bowls according to the ideas presented in these articles. I used two cheap table lamps which I coupled with 2 100 watt equivalent energy efficient bulbs. Over the bulbs I placed a sheet of light tissue paper to defuse the light and make it a little less harsh. I used a sheet of white wrapping paper as a background to keep the focus on the bowl itself.  Placing the bowl in  the frame took some getting used to as they can be quite large. Once I got used to this though it is simply a matter of placing the bowl in positions experience tells me would look best.

 The camera, a Cannon Power Shot A1100 AS,  is mounted on a small cheap tripod which rests on the floor. I place the camera in "program" mode and set the ISO to 400, the light source to tungsten, the effects to vivid, and move the lens setting to Macro. I focus the lens on a forward edge to the bowl or item to be photographed which causes the images furthest from the camera to be slightly out of focus. I feel this adds character and interest to the photo.

The last step in the process is to edit the photos to make them look their best. I use picnik which you can find and use for free at http://www.picnik.com/ simply upload your photos and you can edit them like a pro. I would caution against trying to use software like this to make a bad photo look good. It really takes very little editing to make a photo really look "shopped", it is best to have a good photo to begin with and use this software to crop, re size, and and subtly bring out some of the finer details in the already fine photograph.

 I hope some of the tips and links here help you find your way to even better photos and a more enjoyable experience. It is simply not good enough in the online world to have a great product, you also have to have great photographs. While some I know have hired professional photographers at what I imagine to be relatively great expence I hope my photos show that  you can achive good results with a lower end digital camera and a little know how.